At the Menu Panel, select Maint, then select Manual Operation.
At the Manual Operation window, double-select the code for the probe you want to move as follows.
|
|
Probe |
Code |
|
|
dilution probe |
3.DPPLR |
|
|
sample probe |
16.SPPLR |
|
|
Reagent probe 1 |
37.RPPLR-1 |
|
|
Reagent probe 2 |
49.RPPLR-2 |
Using the Manual Operation window
Select Toggle the number of times necessary to move the probe to the accessible location and then select Exit to close the probe window.
|
|
Probe |
Accessible Location |
|
|
Dilution probe (DPP) |
Over the sample tray
(STT) |
|
|
Sample probe (SPP) |
Over the dilution tray (DTT) |
|
|
Reagent probe 1 (RPP1) |
Over reagent tray 1 (RTT1) |
|
|
Reagent probe 2 (RPP2) |
Over reagent tray 2 (RTT2) |
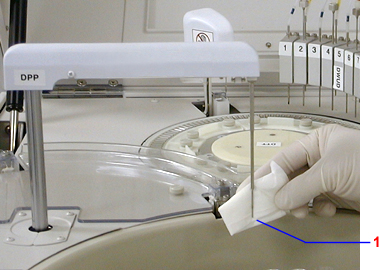
Place a lint free towel under the probe.
Using alcohol prep pads or lint-free towels and 5% bleach solution, wipe the probe (1), then wipe with water.

 CAUTION
To avoid bending the probes, do not use excessive force while cleaning.
NOTE
Verify that the probe ends do not contain any imperfections, which could cause contamination. Replace probes as necessary.
At the Manual Operation window, select Exit.
At the Operation Panel, select Initialize to return all probes to the home position (over the wash cups.)
Verify that the analyzer mode is READY before performing any further actions.